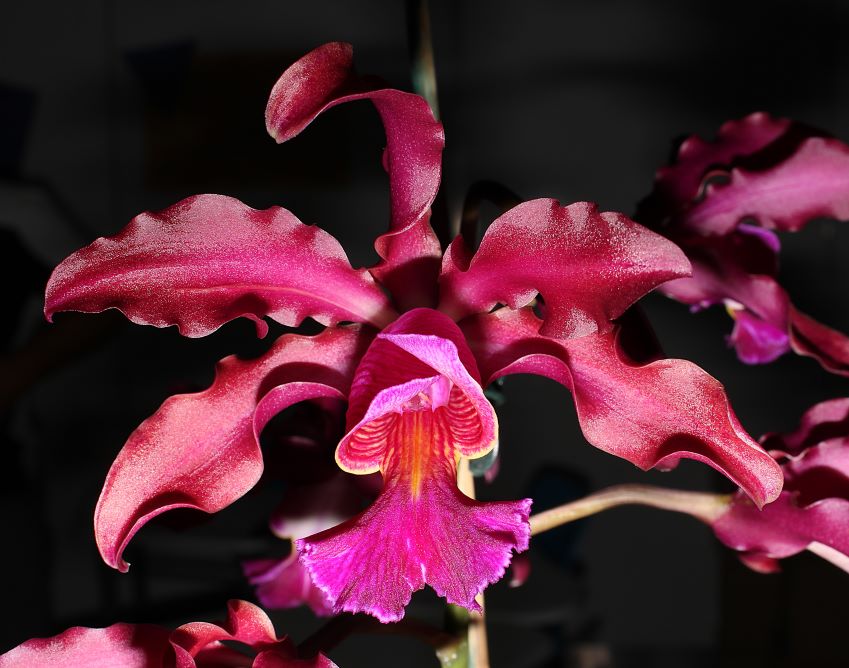
Sunday, September 17, 2023

Dendrobium culture: Dendrobium cucullatum, getting the plant to produce really long canes


 One of my favorite Dendrobium has been Dendrobium cucullatum, also known as Den pierardii, and Den aphyllum.  This species does well in my climatic conditions, so much so that all you need to do is attach it to a tree and it will grow and bloom with little care.  I have had plants of this species for many years.

In photos of this plant in Asia I noted that the plants were in many cases much thicker and longer than my plants and produced more and larger flowers.  After observing my plants, I concluded that the issue was that the plants were in baskets and pots that dried too fast for this species.  As a result, a plant that could potentially produce a six feet cane, would top out at a third of that size.

To rest this hypothesis, I put a three-cane plant of this species in plastic soda bottle that was cut in a way that there is a water reservoir at the bottom of the bottle that the roots of the orchid can reach.  I also made holes that allowed plenty of air to reach the roots, this is to avoid rot.

The results were highly gratifying.  The plant produced a five and a half foot cane, much thicker than usual.  In the second year in the pot its on its way to produce an even larger cane.   This year it bloomed with many flowers, sadly marred by thrips.  I expect that next year it will produce even more flowers.  I have a nasty surprise prepared for any thrip that might show up to eat the flowers.

In the future, I plan to make a basket that will allow for four or five canes to grow together.   Given the large size that such an arrangement would achieve the basket and pot would need to be quite strong not to be turned upside down by the sheer weight of the canes.

On a final note, the size of a plant is influenced by many things, light, fertilizer, watering, genetics, temperature and others.  It may be that some plants of this species are naturally small.  The plant I used for the test came from a parent that I knew can produce at least six foot long canes and maybe longer if given optimal care.  So don’t be frustrated if you plant doesn’t suddenly becomes a giant.


Thursday, September 7, 2023

Dendrobium culture: Observations on the color of the mature canes in some Dendrobium species when exposed to strong light


Many Dendrobium need high light to bloom at their best, but the way they respond to it varies depending on the species.  My Den. nobile blooms with larger flowers with richer color when the canes are getting so much sun that they take a yellowish tint.   On the other hand, the Dendrobium primulinum from Laos produces larger flowers when the canes are exposed to full sun and turn purple.    Den anosmum doesn’t change color too much even when exposed to full sun, perhaps the canes are just a bit lighter green color.  I haven’t noticed a color change in the canes of Den devonianum, but the flowers of my plant which is exposed to full sun for hours in the morning show very pale color in the sepals and petals, so pale that it can make one think the flowers are not of devonianum unless one looks closely.  My newly acquired plant of Dendrobium ceraula shows a deep purple tint on the side of the cane that receives the sun and green on the side that is under the shade of the leaves.  In my experience Dendrobium cucullatum becomes yellowish and stunted if exposed to too much sun.   

Wednesday, September 6, 2023

Dendrobium culture: A shade house for Dendrobium anosmum


Dendrobium anosmum needs exposure to full sunlight to bloom well.   But too much sun burns the plants.   I build this wooden shade house so that I could grow my plants in a place where they got the right balance of sun/shade.   The shade house was oriented so its longest axis was perpendicular to the sunrise in the spring/autumn equinox.   It was eight feet tall so that the long canes of the Dendrobiums could hang down without touching the ground.  It was 10 feet long and four feet wide.  To shield the orchids from the harsh midday sunlight a camo fabric was used.   In places I also used black shade fabric.  Notice the camo fabric has a multitude of holes.  This made a pattern of sunlight and shadow that moved across the plants during the hottest parts of the day.   The desired effect was to achieve something similar to the way sunlight is naturally filtered by the leaves in the forest.

 But the key thing of the shade house was its open sides.  To the east of the shade house there were few trees, so the Dendrobium and other plants would get full strength sunlight from about 8 am to 11 am.   The west side of the shade house faced the closed canopy of the forest, so after midday, the plants were in the shade.   This mimics what happens in the natural habitat, where a plant that is growing in the side of a tree can get plenty of sunlight during part of the day and its on the shade after that.

 I used to have many of plants of Den anosmum.  So many plants that when the shade house was full, I could grow plants that needed lower light levels under the Dendrobium.    I hung the Den anosmum in the east side of the shade house and in the center of the structure, these were the areas that received the most intense sunlight for the longest time.   Under the Dendrobium, in the ground I grew Phaius, Calanthe, Phaiocalanthe, Cymbidium, Paphiopedilum, Vanda and Angraecum.   The shade was narrow to maximize the plants exposure to light while protecting them from the midday sun. 

 During the rainy season, in the afternoon the sky would get cloudy and it would rain, this would reduce the intensity of light in the afternoon.    But in the dry season there would be very sunny days, uninterrupted by any clouds, and this threatened the plants with sunburn, even those that were in their resting phase.  To avoid this, I would put a few old dry palm fronds on the roof of the shade house.  This reduced the level of light to tolerable levels.

When the Dendrobium were ready to bloom, they were moved to the terrace.  You can see the result in the photo below.

The wooden shade house was destroyed by a tropical storm.  It was rebuilt, much stronger, now made of two inch metal pipes.  This one lasted until Hurricane Maria dropped the top of a Teak tree on it.


Monday, September 4, 2023

Brassia culture: Brassia Edvah Loo, how I lost a specimen plant


I used to have an enormous specimen plant of Brassia Edvah Loo ‘Nishida”.   When it was in full bloom, it was something to behold.  The flowers were more than 30 centimeters tall, and the plant produced dozens of them in six large inflorescences.   Sadly, I lost my plant.  How?  I decided to divide it in several smaller pieces.  Up to that point my experience with Brassia was that they rarely got sick, grew fast and were problem free.   But this Brassia showed me there are exceptions to everything.

Because the lead growths were growing over the edge of the pot, I divided the plant in pieces with two to three pseudobulbs and a lead growth.   I gave some pieces away, others I potted some I mounted in fern poles.  To my horror every single piece died.  They didn’t all die at the same time.  What happened was that they stopped growing vigorously.   Some rotted away, others produced smaller and smaller pseudobulbs until they died.  To this day I cannot figure out what happened.  By the way I sterilize with fire every tool I use to cut the stems of the orchids, so it probably wasn’t a pathogen that was accidentally introduced to the plant during the process of dividing it.  

After that depressing experience, I no longer divide specimen plants that way.  What I do is I take a piece from the specimen plant and pot it separately So I have a spare in case it gets sick.   My experience with specimen plants is that as they grow larger, they can naturally divide themselves into pieces as the older parts of the stem die off.   In some cases, like my experience with Paphiopedilum, the stem can divide in separate pieces and yet the roots are joined in a hard root ball so that they cannot be separated without doing horrendous damage to the roots.  In those cases, I take out the old decayed potting material from the root mass and fill the spaces with fresh material.  

Growing an orchid specimen plant takes patience, dedication and consistent care.  It is a huge investment of time and effort.   Damaging the roots of specimen plants should be avoided.  It can severely set back the plant or even kill it.    On a closing note, don't give in to people begging for pieces!!  Send them to a vendor.

Saturday, September 2, 2023

Dendrobium culture: No, its not dead.


For most orchid growers nowadays, Phalaenopsis are the gateway drug to bigger and more expensive plants.  But the Phalaenopsis that are now widely available are the product of many decades of hybridizing toward producing a plant that will survive in the average home even when (shudder of horror), watered with ice cubes.   Orchids species are an entirely different beast.  With 30,000 species (at least) species orchids show growing patterns and seasonal cycles very different from your average hardware store Phalaenopsis.   That is why it is important to read about the plants you buy.  A lot of orchid growers do impulse buying and then are bewildered by the way their plants react. 

 An example of a plant that can confuse a novice grower that is trying species is Dendrobium devonianum.  It produces slim canes that can be almost a meter long.  Unlike the leaves of Phalaenopsis, the leaves of Den. devonianum are slim, delicate and are soon deciduous.   During the growing season a cane of this species has leaves near the growing end of the cane with the rest quite bare.   When the cane stops growing, it eventually sheds all its leaves and for months afterwards it looks like its dead.    If the canes have been exposed to strong light and have developed a purplish color, they can look even worse.

This is an adaptation to the cold dry season when the trees lose their leaves and it rains little.  The orchids then have to endure months of drought and harsh sunlight.   My plant blooms in April, just before the local rainy season starts.  For months it looks like a mass of dead and shriveled stems.   But this is deceptive.  In the nodes of those leafless stems the flower buds are maturing.  A well flowered plant is quite impressive.

If you look at the top photo, the orchid looks like its in a wretched condition, ready to be thrown into the trash can.   But if you look closely, you can see the remains of many inflorescences in the second longest cane.   Note the very small root ball.  That is not unusual, if a plant is well fed and watered it will produce just the minimum of roots it needs to fill its needs.   In the bottom photo you can see the cane covered with flowers.


Friday, September 1, 2023

Bulbophyllum scaberulum (Rolfe) Bolus 1889, on a basket. The irritating problem of long internodes between pseudobulbs


I love the genus Bulbophyllum.  It has an enormous number of species with curious and eye-catching flowers.  But they are also the source of much frustration.  The reason is the long internodes between pseudobulbs.  You put an orchid with long internodes in a pot and before you know it, all its new growths are out of the pot and hanging in the air.  This is not good as pseudobulbs that are not attached to something tend to be weaker than those that are mounted of growing in media like bark or tree fern. 

I have tried many things to tame these uncontrollable plants.  Two things have worked, tying them to a long tree fern pole and tying them to a wire basket full of water retentive media.  With Bulbophyllum scaberulum I tried a wire basket filled with media.  I worked wonders, and in a relatively short time the orchid have covered the outside of the wire basket.   The thing is these plants need constant attention to bend the long internodes back toward the wire basket and tie them so that when the pseudobulb develops the roots will easily find the media.   It is very annoying that they tend to grow in every direction except toward the media.

 As long as I kept a constant watch for new growths and tied them to the basket, everything was hunky-dory.  But since this plant was doing so well, my attention wandered.  What an error.  The next thing I knew all the new growths were in the air.   If this is not corrected, the plants become several chains of pseudobulbs hanging from the basket that are not full size and will not bloom.   This is very irritating.

 My recommendation if you have one of these orchids.   Buy a long tree fern pole and attach the plant to it.  Buy U shaped nails in the hardware store. When this pesky plant starts producing new growths, as soon as you see the new pseudobulb emerging from the internode, use the U shaped nail to attach the growth to the fern pole.  Be careful not to harm the internode as in this stage its not that hard.  So, don’t damage the internode when affixing the U nail to the fern pole.   I have lost several of these Bulbophyllum due to their tendency to gallop across and escape from even the largest pot before you realize it.   Take pieces of your plant and start new plants on other mounts so that if one deteriorates you will not lose the orchid.